
Disciple.Tools provides a powerful bulk delete feature that allows you to delete multiple contacts at once. This guide will walk you through how to safely use this feature to manage your contact database.
Introduction #
The bulk delete feature allows administrators and users with proper permissions to delete multiple contacts simultaneously. This is useful for cleaning up duplicate records, removing test data, or managing large contact databases.
⚠️ Warning: Bulk deletion is permanent and cannot be undone. Always exercise caution and consider backing up your data before performing bulk operations.
Prerequisites #
To use the bulk delete feature, you need:
- Administrative privileges or specific delete permissions for contacts
- Access to the Contacts list view
- Careful consideration of which contacts to delete
Accessing Bulk Delete #
To access the bulk delete functionality:
- Log in to your Disciple.Tools instance
- Navigate to Contacts from the main menu
- In the contacts list view, you’ll see the standard list without any checkboxes initially
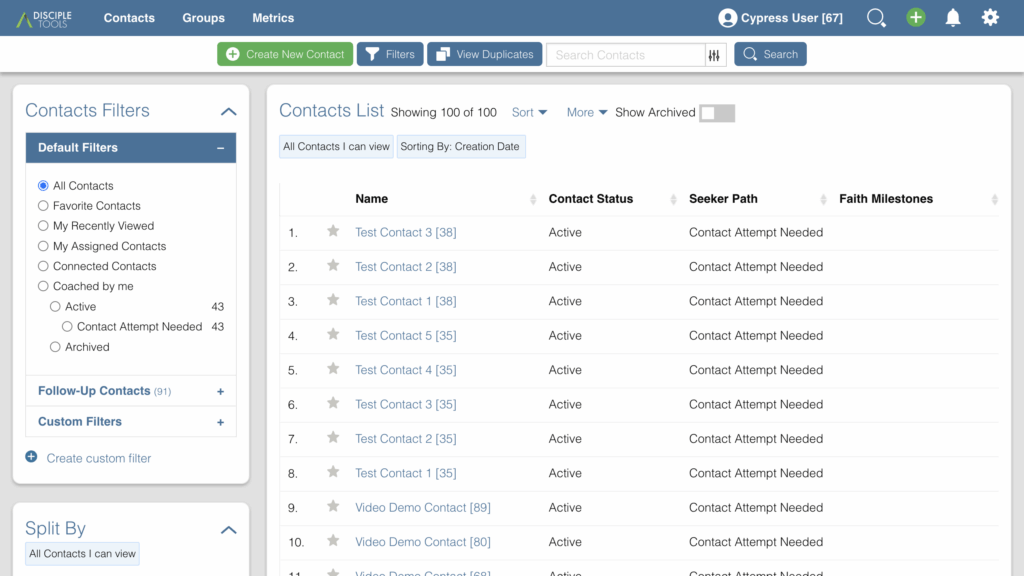
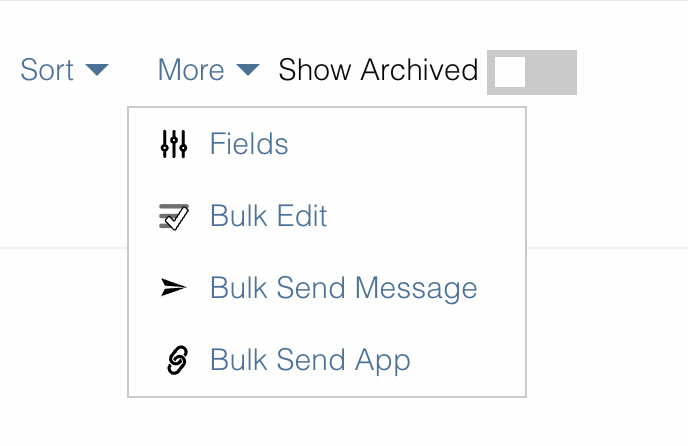
- Click the More dropdown button in the toolbar
- Select Bulk Edit from the dropdown menu
This will activate the bulk edit mode and make the selection checkboxes visible for all contacts in the list.
Selecting Contacts for Deletion #
Using Filters (Optional) #
Before activating bulk edit mode, you may want to filter your list to show only the contacts you intend to delete:
- Use the filter panel on the left side of the screen
- Apply filters such as:
- Status (e.g., “Closed” contacts)
- Last modified date
- Specific tags or categories
- Location
Activating Selection Mode #
Once you’ve applied any desired filters:
- Click More in the toolbar
- Select Bulk Edit from the dropdown
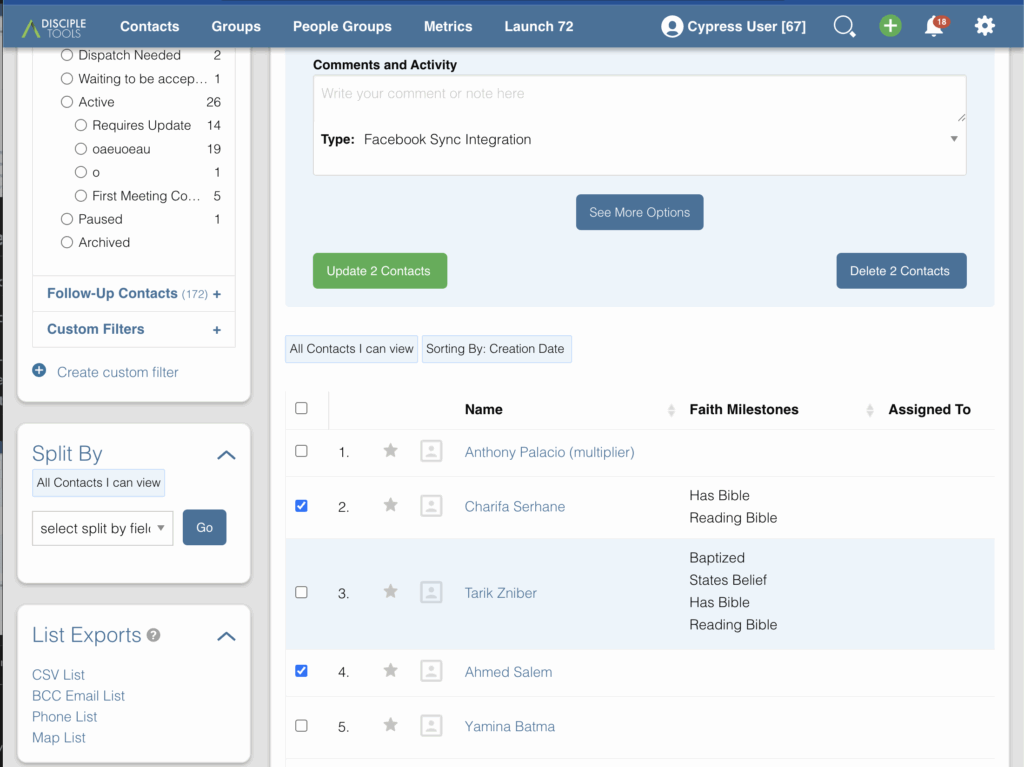
- The page will now show checkboxes next to each contact
- The bulk edit panel will appear at the top of the screen
Selecting Individual Contacts #
After bulk edit mode is activated, you can select specific contacts:
- Check the checkbox next to each contact you want to delete
- Selected contacts will be highlighted
- The bulk edit panel will update to show how many contacts are selected

Selecting All Contacts #
To select all contacts on the current page:
- Click the master checkbox at the top of the contact list (in the table header)
- All visible contacts will be selected automatically
- The bulk edit panel will update to reflect the total selection
Executing Bulk Delete #
Once you have selected the contacts you want to delete:
- The bulk edit panel should already be visible at the top of the screen
- Review your selection – the panel will show how many contacts are selected
- Look for the blue Delete Contacts button in the bulk edit panel
- Click the blue Delete Contacts button
- A confirmation dialog will appear asking you to confirm the deletion
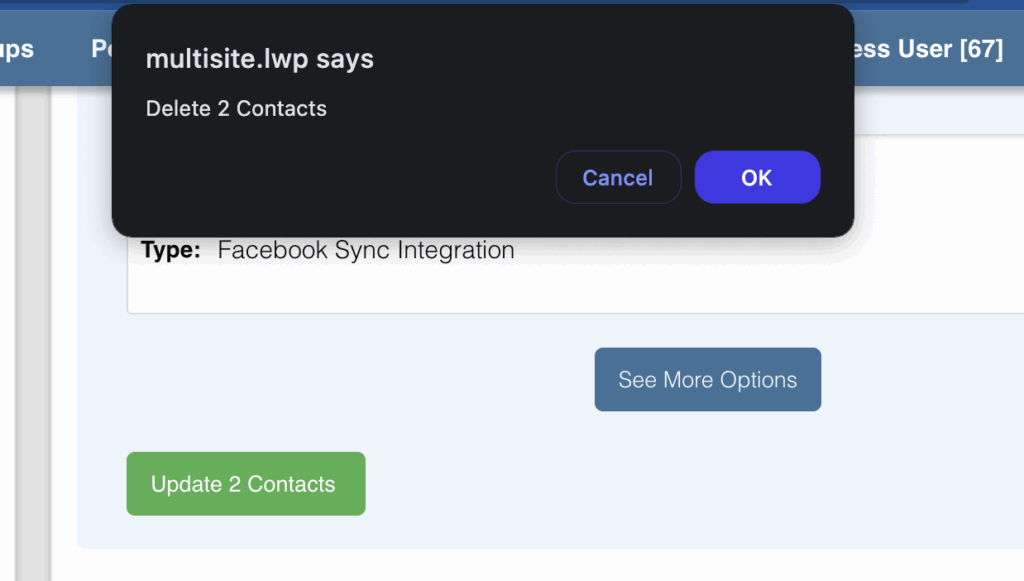
- Click OK to proceed with the deletion, or Cancel to abort
- The system will process the deletions and show a progress indicator
- Once complete, the page will refresh and the deleted contacts will no longer appear in the list
Safety Considerations #
Before Deleting #
- Review your selection carefully: Make sure you have selected only the contacts you intend to delete
- Use filters wisely: Apply appropriate filters to narrow down your selection before activating bulk edit mode
- Double-check the count: The bulk edit panel shows exactly how many contacts are selected
- Consider the impact: Think about how deleting these contacts might affect:
- Groups they belong to
- Activities and reports
- Connections to other records
Data Backup #
- Consider exporting your contact data before performing bulk deletions
- Use the CSV export feature to create a backup of important contact information
Permission Requirements #
- Only users with appropriate delete permissions can perform bulk deletions
- System administrators should carefully manage who has these permissions
Troubleshooting #
Common Issues #
Can’t see checkboxes: Make sure you’ve clicked More → Bulk Edit to activate selection mode.
Delete button not visible: Ensure you have selected at least one contact and have the proper delete permissions.
Permission Denied: If you don’t see the delete option, you may not have the required permissions. Contact your system administrator.
Slow Processing: Large bulk deletions may take time to process. Be patient and avoid refreshing the page during processing.