There are two methods for inviting users. All users are also contacts. Through this process, you will create a contact who is also a teammate.
Administrative Back End #
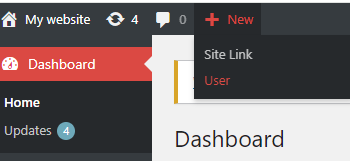
Your co-worker may also need access to Disciple.Tools. Click on the gear symbol in the upper right, then Admin. Click on + New then User at the top of the page. You can add as much information as you like here. Generally, more information makes the built in search capability more effective. Toward the bottom, make sure to check the appropriate roles for this user. Note that as roles change, these permissions can be changed as desired. Click Create User at the bottom of the page. Return to the front end by clicking on the home at the top of the page
Upon clicking Contacts in the blue menu bar, you should now see the user you just created listed as a contact.

Converting a Contact to a User #
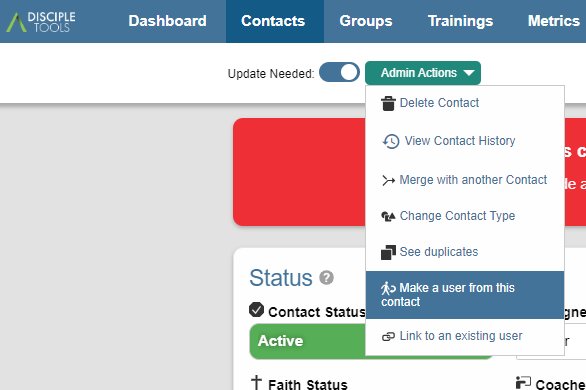
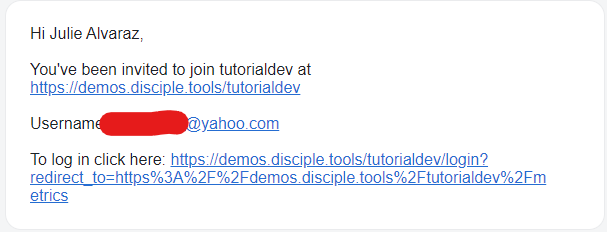
As your disciples mature, some will learn to make disciples. You may wish to allow them to track their Kingdom work in Disciple.Tools just as your other team members do. If you have not already done so, first create a contact. Click the ‘+‘ sign at the top right of the page and enter a name for the contact. Fill in as much information as desired, including email, as you plan to make her an informal part of your team. To give her access to Disciple Tools, within the contact record, click Admin Actions at the top, then Make a user from this contact. More information can be added. Be sure to visit the Role section and check off the appropriate roles, remembering each role has different access to information within Disciple.Tools. Answer the security question. An email (See Below) will be sent to the new user telling her to download D.T and to complete her user registration. Each user email address must be unique.

Note: It is common in D.T that there is more than one way to accomplish an action. Either way you choose to make a user, they will receive an email similar to the one below inviting them to join your Disciple.Tools effort.

