
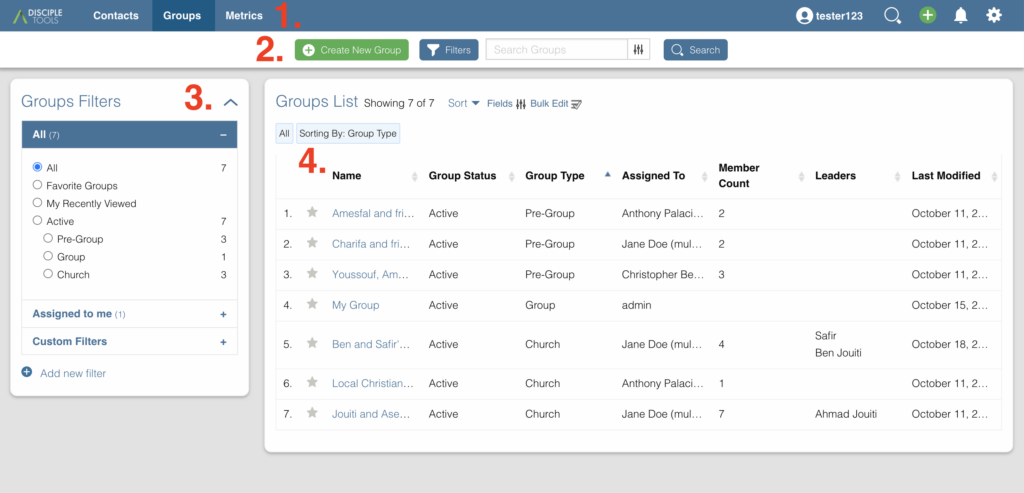
- Website Menu Bar
- Groups List Toolbar
- Group Filters Tile
- Group List Tile
1. Website Menu Bar (Groups)
The Website Menu Bar will remain at the top of every page of Disciple.Tools. 
2. Groups List Toolbar

Create New Group
The  button is located at the top of the
 Group List page. This button allows you to add a new Group Record to Disciple.Tools. Other multipliers can’t see Group Records that you add, but those with the roles of Admin and Dispatcher can see them. Learn more about the Disciple.Tools Roles and their varying permission levels.

Disciple.Tools values the security and safety of all users and contacts.
Clicking this button will open up a modal. Within this modal you will be asked the following option:
- Name of group: A required field that is the name of the group.
After filling out the option click Save and continue editing. You will then be directed to the Group Record Page
Delete a Group
A group’ status can only be set to be Active or Inactive. If you need to remove a group altogether, this can only be done in the WordPress Admin Area.
Filter Groups
To be able to find a group quickly, you can use the Group Filter feature. Click  to begin. On the left hand side are the Filter Options. You can select multiple options for one filter (i.e. church in XYZ location). Click
 Cancel to stop the filtering process. Click Filter Groups to apply the filter.

You can only have one filter active at a time.
Groups Filter Options
Assigned To
- This option will allow you to add names of users who have been assigned to a group.
- You can add names by searching for them and then clicking on the name in the search field.
Group Status
- This tab will allow you to filter based on a group’s status.
- To add a filter option click on the checkbox next to the filter options you want to add.
- Default Group Status filters are as follows:
- Inactive
- Active
Group Type
- This tab will allow you to filter based on a group’s type.
- To add a filter option click on the checkbox next to the filter options you want to add.
- Default Group Type filters are as follows:
- Pre-Group
- Group
- Church
Locations
- This option will allow you to search by the group’s meeting location.
- You can select a location by searching for it and then clicking on the location in the search field.
Search Groups
Type a group’s name to quickly search for it. This will search all the groups you have access to. If there is a group name that matches, it will show in the list. 
3. Group Filters Tile
The default filter options are located on the left of the page under the heading Filters. By clicking these, your list of groups will change.
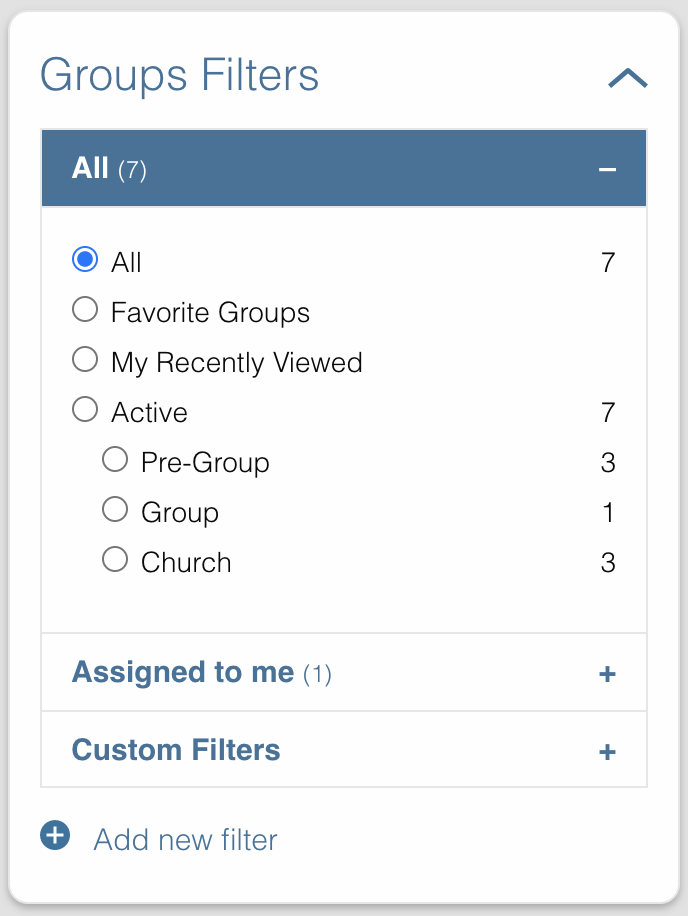
The Default Filters are:
- All groups: Certain roles, such as Admin and Dispatcher, in Disciple.Tools allow you to view all groups in your Disciple.Tools system. Other roles such as Multipliers will only see their groups and groups shared with them under
All groups. - My groups: All groups you personally create or have been assigned to you, can be found under
My groups. - Groups shared with me: These are all groups who other users have shared with you. You do not have responsibility for these groups but you can access their records and comment if needed.
Adding Custom Filters (Groups)
Add
If the default filters do not fit your needs, you can create your own Custom Filter. As mentioned above, you can click or  to begin. They will both take you to the
 New Filter modal. After clicking Filter Groups, that Custom Filter option will appear with the word Save next to it.

To cancel these Custom Filters, refresh the page.
Save
To save a filter, click on the Save button next to the filter name. This will bring up a popup asking for you to name it. Type in the name of your filter and click Save Filter and refresh the page.
Edit
To edit a filter, click on the pencil icon next to a saved filter. This will bring up the filter options tab. The process for editing the filter options tab is the same as adding new filters.
Delete
To delete a filter, click on the trashcan icon next to a saved filter. It will ask for confirmation, click Delete Filter to confirm.
4. Group List Tile
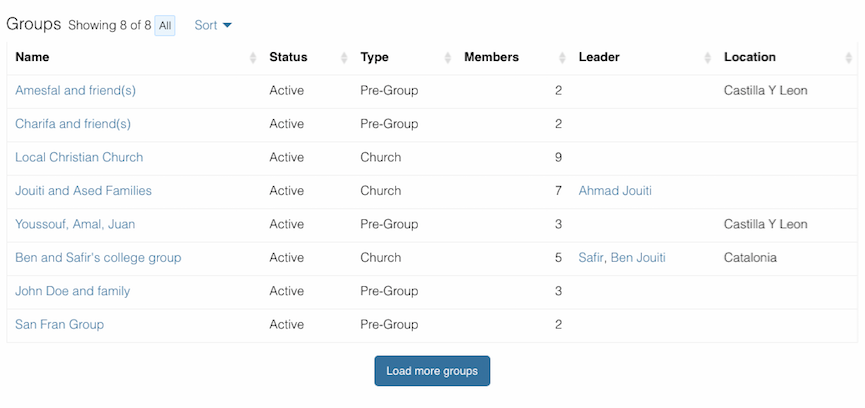
Groups List
Your list of groups will show up here. Whenever you filter groups, the list will also be changed in this section too. Above are fake groups to give you an idea of what it will look like.
Sort
You can sort your groups by newest, oldest, most recently modified, and least recently modified.
Load more groups
If you have a long list of groups they will not all load at once, so clicking this button will allow you to load more. This button will always be there even if you do not have any more groups to load.